Sunday, January 22, 2017

Day 21: Clock Tower, Leap of Hay, Bakery, Trading Booth

Today I started off by building a giant clock tower. Here is a picture:


Here are some steps to build your own: 
Step 1: Build the base. Basically just build the little foundation that it stands on.
Step 2: Build the frame. I built mine out of Spruce logs.
Step 3: Fill in one of the sides with the pattern that you like.
Step 4: Copy the design on each side.
Step 5: Add a roof.
Step 6: Add some nice decorations like lamps and greenery.

That is how to make the clock tower. But if you want to add a leap of hay to it then follow these steps. By the way, the leap of hay is basically just jumping from the top of the tower onto a bale of hay. To make it look nice, copy this picture: 
I recommend making a little cart to make it fit in with your surroundings. 
The next thing that I built was a bakery to store all of my baked goods. Here is a picture: 

I built this by first building the frame, then filling in the walls. Then putting in some windows. Finally, I added a nice roof and decorating the inside.
The last thing that I built was a trading booth. This is a foolproof design. Basically both the traders throw in their items, and when both are satisfied with the trade, they flip the levers. Each person gets what they wanted. Here is a picture or two: 
This was really annoying to build. A lot of trial and error. It is basically just an AND gate with levers and pistons attached. Anyways, Thank you for reading. If you would like me to blog about something specific or you like what I am posting about, then please let me know in the comments below (I am running out of ideas!)

Saturday, January 21, 2017

Day 20: Dock Marketplace

Today I built an another dock next to the stables and horse pasture. Except, this time I added a little marketplace on it. Here is a picture:
Here are some steps if you want to build your own!
Step 1: Make an outline for where you want to build. You can always add onto it later.
Step 2: Make the dock. Basically just fill in the outline with lots of blocks.
Step 3: Outline where you are going to build your shops. Make sure that they are not too far apart, but not too close either. 
Step 4: Build the shops. Make sure that your designs fit the build style.
Step 5: Add decoration! Make that baby look good! I recommend using some lamps (glowstone and trap doors) and maybe even vines. 
Anyways, Thank you for reading. If you would like me to blog about something specific or you like what I am posting about, then please let me know in the comments below (I am running out of ideas!)
Friday, January 20, 2017

Day 19: Parkour Obstacle Course

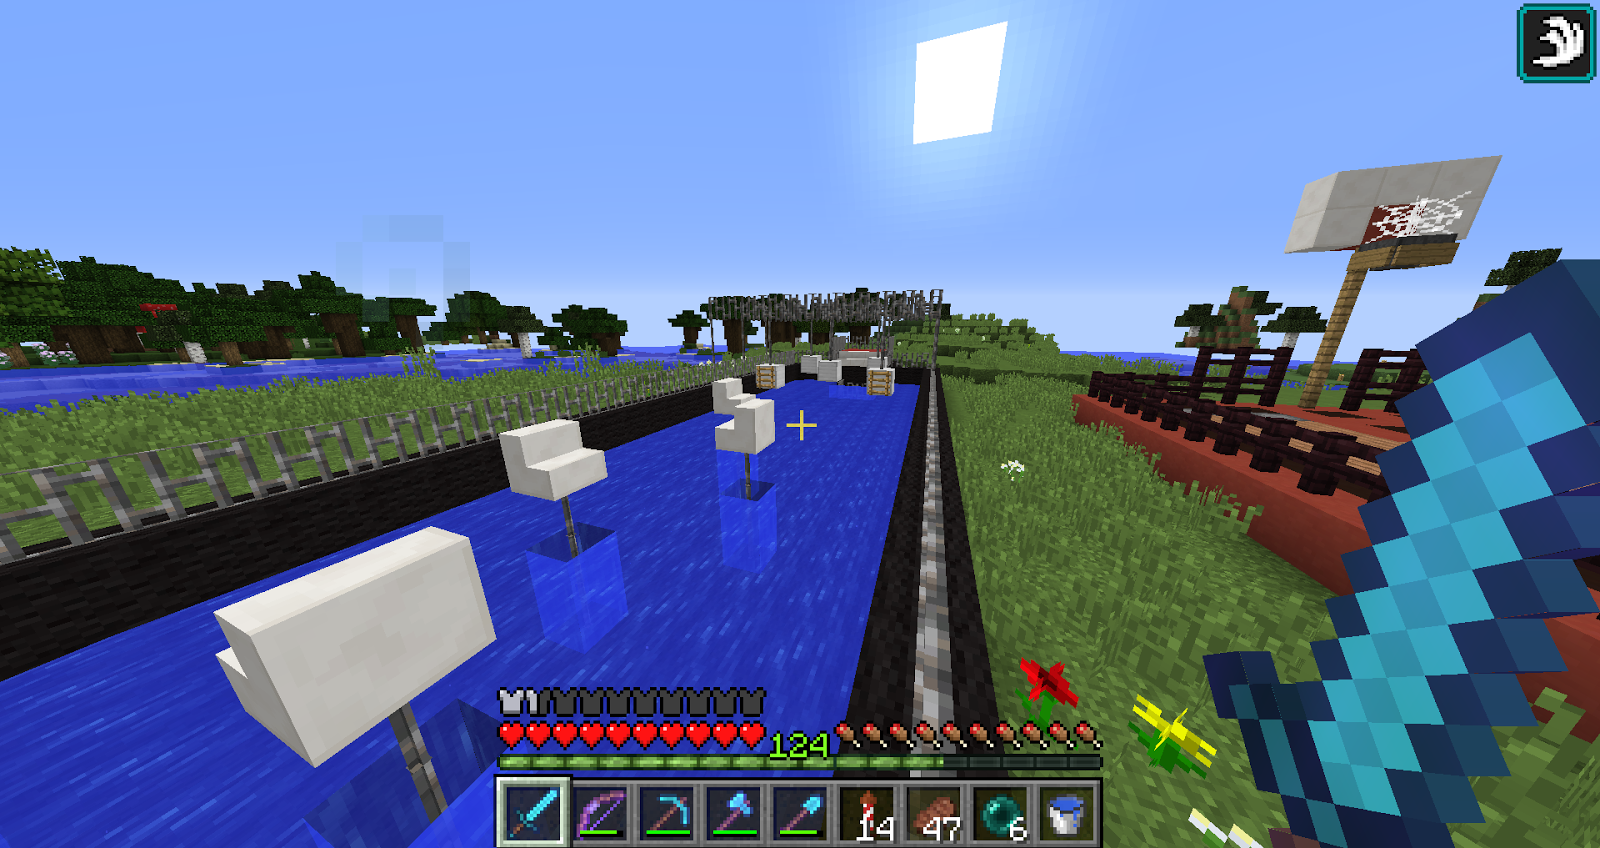
Today I decided to build something a little bit random. From the title, you can tell that I decided to build an obstacle course in the theme of American Ninja Warrior (the TV Show). Here is a picture:
Here are some steps for if you want to build your own. 
Step 1: Build the base frame for your course. Basically, line out the area that you want to build you course in. 
Step 2: Build the walls and fill in the water basin.
Step 3: Place down some markers for where you want to build your obstacles.
Step 4: Build the obstacles.
Step 5: Add an ending point. If you want it to be special, you can add a tripwire connected to a fireworks dispenser. 
Step 6: Add some decorations. Whether it is iron bars around the edge or banners on the top, add something. Unless you don't care how it looks, then....
Anyways, Thank you for reading. If you would like me to blog about something specific or you like what I am posting about, then please let me know in the comments below (I am running out of ideas!)

Thursday, January 19, 2017

Day 18: Auto Tree Farm

Today I built an auto tree farm. I got tired of always having to go chop trees so I created this solution. This is not the most efficient farm by all means. It uses a TON of bones. Here is a picture:

This was annoying to build because I was just using trial and error to create it. I just used a dispenser on a clock to dispense the bonemeal. And a load of pistons to push the trees into a big cube. It is pretty simple to make, but it is expensive. If you are making this yourself, I recommend having a skeleton grinder as well. I used a Redstone torch to put a current through the tree. So that when it grows, It is detected and immediately moved away to another pusher, which pushes it into a giant box. This is afk-able also. I definitely will be afk-ing. The only real flaw with it is that it runs out of space very quickly. 
Thank you for reading. If you enjoyed then please leave a comment saying so. I will see you next blog!

Tuesday, January 17, 2017

Day 17: Marketplace Expansion

Today I built a market place expansion. Here is a picture:
I built two more stalls and a small flower garden thing. I am really trying to add more to the marketplace and maybe later make it actually a functioning device. It would be awesome to get people on to my server and have a group trading event. Anyways, this is all I have time for today, so if you liked, then please follow me in the top left corner of my website. You will get notification about when I post. Also, if you have a Minecraft account and would like to join me, then please go ahead and comment so. Finally, if like what I am doing, or want me to build something in particular, please comment so.

Monday, January 16, 2017

Day 16: Cow Farm, Horse Pasture, and Elytra Tunnel

Today I started off by building a Cow farm. I got tired of always running out of food and having to go hunting. Here is a picture:
I built this by first digging out a large area, then added some cow areas. There are four areas where I can breed cows. All of the baby cows get pushed into a water stream. This water stream has a mob elevator that pushes them to the top. From their they are moved into a killing chamber. There is a small control panel. If press that button, the dispensers dispense water, causing the cows to bob up and down. This makes it easier to breed them. 
The second thing that I built today was a horse pasture. I began to breed lots of horses, and they wouldn't fit in my small stable. Here is a picture: 
This was very simple to build. I started off by flattening some land. Then added a fence around it. I bone mealed the ground to add some grass and flowers. Finally I dug out a little pond and threw in some hay bales. 
The third thing that I built today was an elytra tunnel from my island to another island. Here are some pictures: 

I built this by digging out a small tunnel from island to island. Then I added some TNT, and BOOM! It was finished! Not really... I had to carve out a lot of the tunnel because I kept hitting my head on the top when I flew inside. Thank you for reading! I hope you enjoyed this blog! Hit the follow button on the top left of the website if you want to get notifications about when I post my blogs!

Sunday, January 15, 2017

Day 15: Fishhook Island Watch Tower

Today I built a watch tower on Fishhook Island! Here is a picture:
I built it by first building the frame, then building the decorations on the sides (Fences). Finally, building the roof. With this, I can watch out for any intruders on my own personal island! I am going to try to post something about fishhook island every day! Also, on this server, I have built a TON of stuff, just haven't showed it. Tell me if you would like me to take some pictures and maybe do a blog post on it!